Dive Deeper into Water Savings
There are four main things that can be done to your irrigation system that can yield deeper water savings.
1. Sprinkler improvements
2. Converting to drip irrigation
3. Upgrading to a smart controller and/or soil moisture sensing
4. Rainwater capture

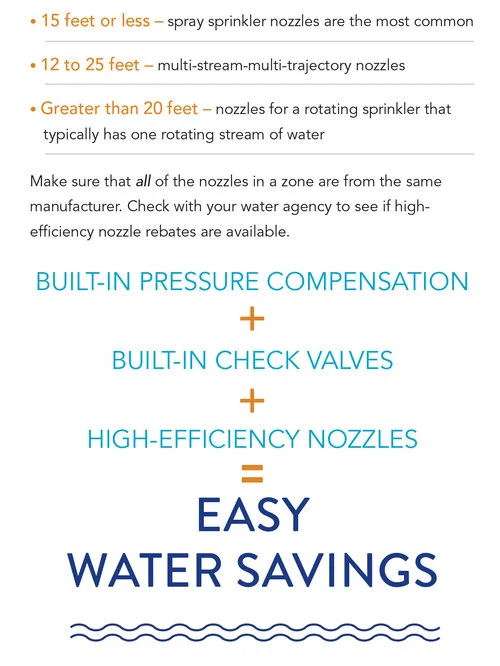
Water Savings with Sprinkler Improvements

Image courtesy of Rain Bird, Inc.
Many homes have high water pressure. In a recent study (See footnote #7), the average home saw 70 pounds per square inch (psi) for their outdoor irrigation. Yet, many manufacturers recommend that spray sprinklers operate at 30 psi and rotating sprinklers operate at 40-45 psi. In another study, just having pressure 20 psi over the manufacturer’s recommended psi resulted in up to a 1 gallon per minute of water wasted for each sprinkler. That means if you had 10 sprinklers on a zone, you would waste 10 gallons per minute for each minute the system operated. If the zone ran for 10 minutes, 100 gallons would be wasted every time it watered. There is an easy fix for this: Replace the guts or inner components of the sprinkler with pressure regulating guts in the stem.
Another problem that can cause wasted water is having the lowest sprinkler head on a zone drool out onto the sidewalk or drive-way. There is an easy fix for this as well: Replace the guts or inner components of each sprinkler in the zone with those that incorporate a check valve.
Want more water savings with your sprinklers?
Consider replacing your sprinkler nozzles with high-efficiency nozzles. These nozzles are tested to a standard and must meet a performance threshold. These nozzles can be spray sprinkler nozzles, multi-stream-multi-trajectory nozzles, or nozzles installed into a rotating sprinkler. The difference between these nozzles is the distance of throw.

Water Savings by Converting to Drip Irrigation

Many landscapes have planter areas with shrubs that are currently irrigated with spray sprinklers. The sprinklers can easily be converted to drip irrigation which can result in 20% to more than 50% water savings. There are two ways to convert spray sprinklers to drip. First, look for conversion kits that have a filter and pressure regulator as well as a way to cap off most existing sprinklers by using special caps. (The sprinklers don’t have to be removed.) The second way is to remove the existing sprinklers and to cap them off at their risers using ½" PVC caps.
Now you can easily install the tubing. If the shrub area is sparsely planted, you can use the point-source method of watering by adding emitters on either side of the shrub. For denser plantings, using the dripline method would be the fastest and most beneficial for the plants and soil. Just lay out the dripline in a grid pattern. With either method, use fittings to connect the pieces of tubing and stakes to keep the tubing in place. Be sure to use tubing and fittings that are from the same manufacturer. Once the drip is installed, install mulch. Mulch adds extra water savings because there is less evaporation of water from the soil when mulch is installed. An added benefit is that mulch reduces weed growth. And, if organic, mulch enhances the soil environment.
See the DRIP IRRIGATION section for further explanation, guides, and videos.
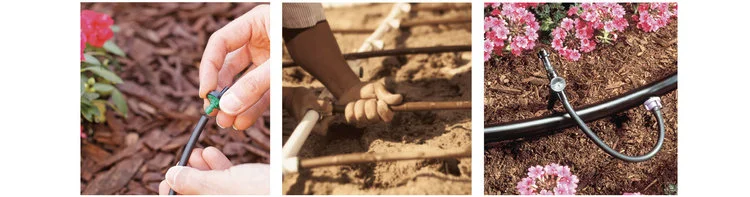
Images courtesy of Rain Bird, Inc.

Water Savings by Upgrading to a Smart Controller or Soil Moisture Sensor
It's important to adjust your irrigation schedule at least monthly throughout the year since weather changes directly impact water requirements of a plant. More than half of a plant's annual water needs occur during the summer, except for native plants! Just by remembering to reduce the days you water during autumn and winter can increase the health of your plants and greatly reduce water waste. Whether you hand water or use a conventional controller, remember to make these adjustments. Using the "feel method" or a soil moisture sensor can help out a lot, too!
Smart Controllers
A smart or weather-based controller will adjust your controller for you based on temperature, hours of daylight, humidity, wind and rainfall, among other factors, then it will schedule the controller to operate accordingly. Most likely, the controller will operate most days in the summer but the real water savings will occur during the fall, winter, and spring when the controller will go days before watering.
How do you know which smart controller to choose when there are so many models available? You can look for a third-party validation such as EPA WaterSense (like EnergyStar, except for water-using products). However, not all certified controllers are equal. Look for a smart controller that not only adjusts the schedule based on weather conditions, but combines the concept of deep, infrequent watering. The controller logic should look for ways to eliminate watering days rather than adjusting the run time. Not all smart controllers on the market do this. You want one that has a “soil moisture depletion factor.” In other words, it will take into account how much water has been depleted from the soil. This builds in a dry-down time between watering days so landscapes will not get watered too frequently. It promotes deep, infrequent watering which is healthier for plants.
Soil Moisture Sensors

Agriculture has used soil moisture sensors with great accuracy for many years. In landscapes, soil moisture sensors can be tricky to use because there are so many variables in a landscape compared to a homogeneous crop. However, if your controller has the ability to allow a soil moisture sensor for each program, and you have an accurate representational location for each sensor, this can be the most accurate way to monitor a landscape’s water needs.
If you want to go "low-tech," purchase an inexpensive soil moisture meter probe (about $10 to $20). These types of meters are fairly accurate. Use it to see the moisture content in various places in your yard. You will be surprised!

Water savings by capturing rainwater and creating rain gardens

Have you ever noticed how vibrant and healthy a landscape looks after a good soaking rain? Even with our relatively low rainfall averages, capturing rainwater for landscape use has advantages. Rainwater is good for plants. In addition to providing water, think of it as a cleanser. It does not contain harmful salts and other minerals that can harm root growth. Rain can actually flush salts and minerals below the root zone.
In order to use rainwater, it must be captured, diverted, and stored. The simplest system can be a rain garden that collects water from a roof surface where all rainwater is diverted into a catchment area for holding in the soil. It takes planning. As the rainy season ends, nearby plants utilize what is stored in the surrounding soil. This obviously won’t provide enough water for the entire summer in some areas, but it will certainly help. Sophisticated systems can be created with large cisterns connected to an irrigation system.
Advantages of using rainwater:
• Retains water on site
• Reduces or eliminates runoff of contaminated water entering storm drains and local bodies of water
• Removes salt accumulation in the soil which can harm roots
• Acts as a natural filter, slowing the flow of water so it soaks into the soil where microorganisms can do their job in removing pollutants
• Recharges groundwater
• The water is free!
Here is a helpful publication from the University of California (Provided with permission):
“Take the dive for huge potential water savings just by fixing or upgrading your current irrigation system!”